Friday, February 17, 2012

Woooohooo, A 2-Day Sale!


A brand new set in the shop plus 40% all of my products give you a big reason to shout WOOOOHOOO!
If you like the art in this banner ad, then you are sure to like several of my recent sets. 

For the digi stamp people, there is What a Hoot.


For card making, invitations, embroidery, scrapbooking, graphic & web design,
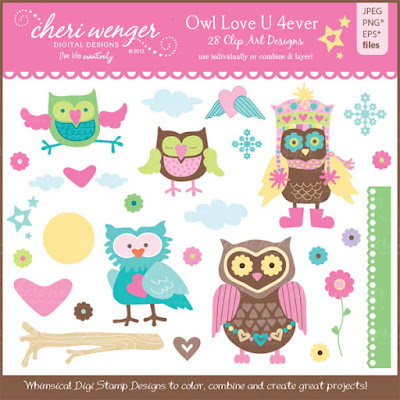
check out Owl Love U 4ever.


For printable cards to say I love you, Owlentines is a real favorite!


And for those who are sports enthusiasts or simply have a child who plays a sport, my Feeling Sporty set of versatile graphics is anything but basic. 


High quality dimensional clip art designs which can be used on so many creative items from embroidery to crafting to design...and also 40% off for the next 2 days!

Save today on digital art so you can live your life creatively!

Monday, February 13, 2012

Colors That Will Make Your Digi Garden Smile

Anticipating the latest cool front to move on out so that we can kick start spring time, I designed this set of coral, melon, yellow and brown flowers. You can use these designs individually or in groupings for graphic design, greeting cards, invitations, birth announcements, scrapbooking and crafting. These would make beautiful embroidered designs, too!

The Fresh Florals set is a combination of loose doodles combined with softly textured edges on the solid petal shapes. Coral is a hot color trend and these designs look great on a soft yellow or solid white background for a fresh, contemporary look.

If you still need to send a Valentine card, check out the email version I created using the photo card in my Owlentines Printable card and invitation set. I just personalized by adding photos in Photoshop and our family name.

Friday, February 10, 2012

Tips for a Successful Photo Shoot


TIPS FOR A SUCCESFUL PHOTO SHOOT
by Cheri Wenger

1.     Discuss your goals & expectations with your photographer.
Successful photo shoots start with setting clear goals as well as taking time to share your ideas beforehand. This helps the photographer to brainstorm ideas, gather necessary props and/or make their own comments & suggestions.

2.     Make it Personal.
Lifestyle portraiture works best when the model(s) are doing things or are surrounded by things
they love & enjoy. So if you have favorite articles of clothing, jewelry or a personal possession that means a lot to you, bring it to the shoot. Whether it is a goofy hat, a treasured heirloom from your grandmother, a favorite snuggly or a piece of sports gear, it will help to capture the essence of you in photos.

3.     Show up prepared — rely on a checklist.
Nothing can spoil a shoot more than running late or forgetting something important. You will leave the shoot feeling disappointed & having regrets. So make a checklist of things you intend to bring, and set a goal to arrive early so if there are some last minute things to discuss or set up, it will ensure starting on time. In not rushing, both you and your photographer will be more relaxed and less stressed…resulting in a better photo session.

4.     Discuss weather, lighting & the possibilities of rescheduling.
Natural lit portraits require planning to achieve the right lighting and scenery. Photographers can do their best to work around non-ideal lighting conditions, unexpected interruptions such as other people at the same location, and even make the best of the weather; however, there may be some circumstances that simply won’t work for the time or day of your shoot. Discuss in advance plans for reshooting and possibly pencil in a back up date especially if you need the images within a certain time frame.

5.     Create the look you want to capture in your photos.
Consider your goals. Do you want these photos to express the real you, the fairytale you or somewhere in between? If a glamorous photo is what you are after, you need to dress the part. If you would like the photos to be representative of your everyday family life, then everyone dressing alike may not be the best wardrobe choice. These are things to discuss with your photographer so that they can make suggestions as to the style and colors you should consider wearing, as well as what not to wear. In general, busy stripes and plaids or very bold, patterned prints can be distracting, and should be avoided. For beach shots, combinations of white or black with khaki or denim are often recommended. My personal belief is that you can use a variety of pastel colors, too, with white, denim or khaki to avoid everyone looking too ”matchy“. For example, mom in a white shirt, dad and the boys in baby blue and the girls in pastel dress with each of those colors in the pattern or print. If you want to wear a bright or bold patterned dress, then the background should be rather neutral. Keep in mind whether you want people to notice you or your clothing in the portrait. The key is that the style of clothing should be representative of you. Always experiment with your hair and make up beforehand, and not the day of your shoot. Avoid getting your hair cut just days before the shoot. Give yourself time to learn to work with the new cut unless your goal is to portray yourself in a different light or create a whole new image. Stay clear of heavy, glossy or metallic make-up when taking natural lit, outdoor portraits. Those work best for studio lit photos and will not result in beautiful, natural-looking portraits. Remember, the photographer can work their magic, but you need to show up looking the part.

© 2012 Cheri Wenger Design Photography

Friday, February 3, 2012

Gift Inspiration for Valentine’s Day

Today, I discovered that one of my old craft creations was featured on tipjunkie.com as an example for a teacher’s gift idea. This made me realize that I should share some of my previous craft projects that are excellent inspiration for handmade Valentine Gifts. Although most of these can be found in my Picasa web galleries, I will save you the time in sorting through all the images...you can do that later by clicking the link above. I hope that these will be a springboard to your own creativity!


 Idea 1: Use items you have to dress up something ordinary!


Skill level: Beginner. 
I used paper flowers, buttons and ribbon to turn this dull storage box into a colorful, gift that my daughter can use to store her hair accessories or casual jewelry. All you need are some great adhesives. My suggestion: Glue Art’s extreme adhesive squares.


Skill level: Beginner.
For this second example, I purchased colorful buttons and used the same adhesive squares to dress up this ordinary lampshade. Note: Until I figured out the exact placement, I used smaller pieces of adhesive on the back of each button. I also layered some of the buttons beforehand for more color and interest.


 Idea 2: Turn an old container (candle jar with lid) into a matching gift set.


Skill level: Advanced; see suggestions for making it a beginner level project.
Using  coordinating papers, stamps and supplies, I created this gift, card & bag matching set by recycling and lidded glass candle jar, covering the sides and lid and trimming with a sweet stamped saying. If you are not good at cutting and stamping use pre-cut elements, stickers, colored chipboard embellishments, silk flowers, ribbons and rhinestones to turn this into a simpler, yet wonderful project.


Idea 3: Personalize a frame and turn it into a piece of art.


Skill level: Beginner-Intermediate
You can see some of the steps for this project in my Glue Arts Project gallery. This same project idea can be done at any skill level based upon the steps you choose to add. 

Skill level: Beginner:
You can start out by simply dressing up a purchased frame (great use for those 40% off coupons at the craft store!) along with some basic embellishments like sequins, adhesive pearls, rhinestones or gems, maybe some silk or paper flowers and some ribbon. You will also require some type of permanent adhesive that is strong enough to stay adhered, yet small enough to use on tiny items such as thin ribbon. For this I, once again, used extreme adhesive squares on the items that did not contain adhesive backing. Create a ribbon with some long tails and attach to one of the top corners and trail the tails around the frame using the small adhesive squares to create a flowy feel. Then dress up with various sizes of adhesive gems or pearls to complete your beginner level gift. The frame is now ready for a photo.

Skill level: Advanced
Now, step it up by creating artwork to go inside your frame or on top of the glass. For this example, I mounted a photo of my girls onto a piece of pink paper trimmed to fit the window of the frame. I used svg diecuts of my Lovey Dovey Brushes set of digital art to cut black vinyl to add to the top of the frame. I used adhesive alphabet letters to add the phrase Oh so tweet tot he glass and filled in the space by adding black sequins with white pearls on top. Now the top art is easy to display and clean.

Skill level: Intermediate
This takes a bit more time and skill, but I used some basic punches to create my own handmade, sugared flower from cardstock, glitter, a paint brush and crystal effects.  To shape the flower and folded the punched floral shape, bent and manipulated it. I used adhesive squares to attach the segments to one another to form the flower, then brushed the crystal effects onto the flower and sprinkled with dazzling diamonds glitter to give it the shimmery look. I paired with other diecut stems. You can achieve a similar look by adding pre-purchased sugared flowers from Prima. I also added a vinyl diecut heart layered onto pink cardstock on top of the ribbon. For this, you can substitute a sticker or chipboard element.


Idea 4: Transform a heart shaped craft box into a 3D display for the love of your life. 


Skill level: Advanced to Intermediate
This project started with the purchase of a kraft heart shaped box with a lid and evolved into a mini 3-D display featuring a foam core photo cut out, diecuts, trim and other embellishments. This makes a nice shelf display and also works well as an anniversary gift, especially for a special anniversary. The measuring, gluing and cutting make this a more advanced undertaking.


Idea 5: Create a relationship keepsake box. 


Skill level: Advanced
When I spotted this kraft box with a two-piece framed lid, I knew it would be fun to turn into a shadow box keepsake gift for my daughter to keep all the mementos of her high school relationship. Purchasing a themed scrapbook collection makes this project much easier due to all the great coordinating papers and embellishments that there are to use. The square lid insert became my main canvas. Tip: you may want to dray a light pencil line around the window opening of the outer lid on top of the square so you will know what are is visible once assembled. Decorate away with elements. You can even add in personal items such as ticket stubs, photo booth strips, etc. This idea can also be used as a birthday idea featuring the person's special interest i.e. a sport they play, activity i.e. theatre or dance, or a hobby they enjoy.
This sits on Kylie's shelf as room decor and a place to store notes, photos and other mementos.


Idea 6: Create a scrapbook page featuring the things or people that you love.


Skill level: Beginner-Intermediate
Beginner to Intermediate scrapbookers of all levels can create a page related to love: people they love, things they love or stories about being in love. These layouts can be framed in a 12 x 12 frame as a gift, mounted onto foam board to lean against something or given with a long piece of ribbon, some push pins and two spring-hinged clothes pins to hang on a ribbon banner on a wall.


Idea 7: Purchase a mini scrapbook album kit and 
personalize with photos, journaling & embellishements.


Skill level: Beginner-Intermediate
Even advanced crafters can make the best out of pre-made kits. As a beginner, you can simply assemble per the kit contents and instructions, or you can deviate by adding your creativity and own items to turn into a more advance project design. This was a small gift album I made for my mother, shown with photos of my sister and niece. Each page had some sweet photos that I knew she would enjoy. The finished album is pretty enough to leave out on a table top on display, and always close by to thumb through and experience a bit of family love.


Idea 8: Recycle packaging into a wonderful treat box.


Skill level: Beginner
I just love when I can recycle or repurpose things I have into wonderful gifts for friends and loved ones. This treat container was created for my niece from the empty packaging from my Glue Arts adhesive cartridges. I washed, dried then decorated it with stickers, gems and a tag. I used silk flower petals, trim and a button to make my own decorative flower. The epoxy sprinkles added a fun "sweet" element to this treat container which I filled with candies. This also makes a regiftable container for the recipient to pass along the love.


Idea 9: Cover simple boxes with stamped or diecut designs to make lovely gift boxes.


Skill level: Beginner-Advanced
As you can see, I love working with small boxes. We all have them and they come in so many fun shapes and sizes. Covering them with paint, papers, fabric, ribbons, trims and embellishments makes them that much more enjoyable to receive. Fill them with covered candies, add tissue and cookies, bath salts, packages of tea bags, cocoa, or use as an elegant way to give jewelry as a gift.


Idea 10: Dress up a store purchase.


Skill level: Beginner-Advanced
Embossing is a very elegant, yet simple crafting technique that always looks so impressive. It requires a stamp, either pigment or embossing ink pad, a heat tool and some scrap paper to recycle the unused embossing powder back into the container. For the candle wrappers, I used white embossing powder with a flourish and a heart stamp. You can take this simple candle wrapper idea to the next level and turn this into a romantic tabletop display by decorating a vase and creating a Valentine pick to put inside the vase. Ribbons, gems, floral picks, flowers, photos, etc. can be added to customize each item.

I hope that these ten Valentine Gift making ideas help you to 

Thursday, February 2, 2012

Clean House = Creativity Interupted

When I saw this post on Facebook about housecleaning, I knew I would have to blog about it at some time or another. You see, housecleaning is one of my least favorite things in life to do. I joke that I am allergic to it, but seriously in some ways I am...well, at least to the cleaning products. The only other things I dislike more are prepping taxes and the length of time it takes to get hair color and highlights! O.K., enough dreariness for the day.

You have to admit there is a certain amount of truth to this statement. Anyone who relies on their computer for work feels at a total loss when things aren't working right. Just the other night my husband booked a hotel which turned out to be a time share with no internet. He woke up at 6:00 to go to a coffee shop just so he could check countless emails that would have taken forever on his phone. For me and the world of creativity, I can get lost in the creative process. I would feel at a real disadvantage not to have use of my scanner or computer. I still have my sketch pad and laptop to fall back on, but the day my house looks like a museum means I have quit being creative.

On the creative front, I have a set of digital Valentines called Owlentines. Yes, I have admittedly become obsessed with Owls. That is my college girl's school mascot and I hadn't designed anything with owls up until now. My 3 latest sets can be found on Mygrafico...What A Hoot, Owl Love U 4ever and my soon to release Owlentines set. Locate my shop under the designers pull down menu > Cheri Wenger :D.

These are my three favorites from that set. One is a photo Valentine that you can use, the other two are single panel printable or emailable cards. Here is a peek at those:


On another creative front, I had the opportunity to do an impromptu photo shoot of our 16 yr. old daughter, Kylie. She looked so adorable in her scarf and the jean jacket she borrowed from her sister's closet. I would say shhh, but she saw the photos on facebook and busted Kylie 6 seconds after I posted. She just doesn't like to share her possessions, LOL! My lifestyle photographs are taken with available lighting. This session had me dodging the sun’s brightness as it crept in and out of the clouds.

Photo Tip for the day: Did you know that the best times for shooting photos are when the sun is low in the sky? That means early morning hours or right before sunset. The warm glow the sun gives photos at these hours is magical. But when the sun is shining bright, tuck around a shaded corner that still has some bright light to get that warmth you are looking for with out the shadows. You can also set your SLR camera's fill flash to a low setting to counter those shadows when shooting in sunlight.

Here are my favorites from that photo shoot using a vintage effect on the photos.


Today, I regret to say that I am doing more housework than I care to be doing, but I will get it out of the way so I can get back to creating, illustrating, photographing, and just plain living life creatively!

Friday, January 27, 2012

Create, Save, Smile!

What do these three words have in common? New digital design releases and a 4 day, 40% sale in my digi shop at MyGrafico. I just finished three new sets featuring Owls with a Valentine/Love theme, but these adorable digi stamps and clip art designs can be used any day of the year to bring cheer.


Here is a digital card example showing how much fun you can have creating with the Owl Love U 4ever set, my personal favorite design on 2012...so far, anyways! ;D  I have always loved owls, but had never designed a set with them. I started with sketches for digi stamps that you can color and add to your card creations, but I am a girl who love color so I couldn’t resist creating some clip art designs and printable artwork, too! Here is a peek at that set. This was designed with my new color palette for 2012!


Two of the three owl sets are posted in the shop...What a Hoot Digi Stamps and Owl Love U 4ever,  and the third is a printable set of cards and invites called Owlentines that I will be releasing soon. Here is a sneak peek at it! I will also be adding a free digital Owlentine valentine printable.


So if these cute designs aren't enough to bring a cheery smile to your face, maybe a 4-day sale on digitals at 40% off will do the trick! Check out my shop by going to the main page, finding Cheri Wenger under the designers pull down menu on the left hand side of the web page. There you can see all of my shops. If you prefer to shop by category, click the links above this, however you will have to sort through designs from other shops to find mine. Have a very creative weekend! I will be cheering Kylie on in the Disney Classic Volleyball tournament at the Wide World of Sports complex.


Monday, January 23, 2012

Big Mouthed Valentine Cards - nothing says LOVE any better!

I have been really busy making up some samples from one of my newest sets: Big Mouth Valentines Digi Stamps. The monkey, lion and bird in this set all have a perfect heart shape in their mouthes...so very fun to create with! You can hand color the heart, print it on patterned cardstock and layer, glitter it, emboss it, and add shine with crystal effects. And these are perfect to use for whimsical anniversary cards or expressions of love.

I will be posting a tutorial on how to get started using digi stamps where I will share with you a sample sheet showing how I set up pages for printing and cutting that can be used over and over again. So check back to my blog later for that lesson!

This is a preview of the set showing all the verses and images that come with it. It contains the artwork in jpeg, eps and png file formats which you can place into Word documents to print out or edit in your graphics and photo editing software. Digi stamps are super easy to just printout and hand color...my favorite way to use them on projects, but there are many more ways to use them creatively so don't let that limit you.


Today, I will post a few of the Valentine Cards, but you can view more of these in the MyGrafico gallery or in my Picasa Hybrid cards gallery. There are also links to the sets underneath each image.


Lion Happy Valentine's Day Card

created with Big Mouth Valentines digi stamps
http://www.mygrafico.com/digital-stamps/big-mouth-valentines-ds/prod_6452.html and http://www.mygrafico.com/digi-tools/digital-doilies-1/prod_4219.html


Lion Square Wavy Striped Valentine's Card
Cards come in all shapes and sizes. For this one, I made it 5" x 5" square. It features the lion digi stamp from my Big Mouth Valentines Digi Stamp set: http://www.mygrafico.com/digital-stamps/big-mouth-valentines-ds/prod_6452.html 

The inside features one of the digi verses with some red glitter inside of the heart.


Bird Love You Lots Tweety Card

This card of softly layered colors with a brightly colored digi stamp makes an adorable Valentine or Anniversary card. I created it with the bird digi stamp image from my Big Mouth Valentines digi stamps set:
http://www.mygrafico.com/digital-stamps/big-mouth-valentines-ds/prod_6452.html 


A layered digi verse was used on the inside to make this into a Valentine's Card, but
this same card design could be used for anniversary or just an note of love & encouragment.


Monkey Wanna Monkey Around Card

Love this color combination I used to create this whimsical valentine card. It uses the monkey digi stamp from my Big Mouth Valentines digi stamp set.
http://www.mygrafico.com/digital-stamps/big-mouth-valentines-ds/prod_6452.html


Cardstock is from Bohemia collection, The Little Moments Dots and Doodlebug designs striped paper. Lavender and turquoise solid linen papers are from Recollections.


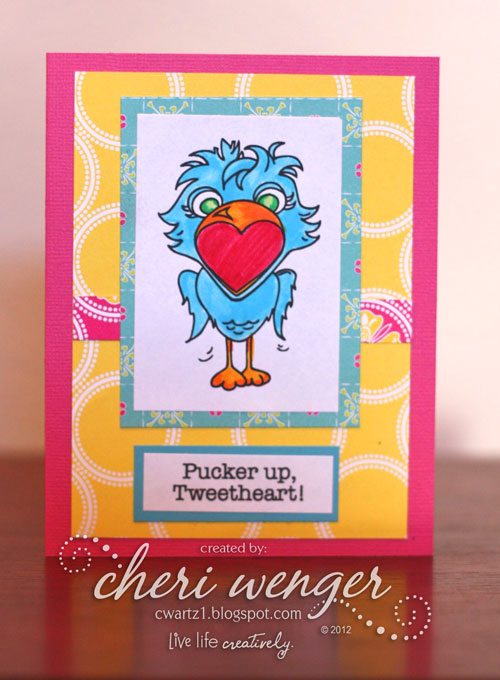
Bird Pucker Up Tweetheart Card
created with Big Mouth Valentines digi stamps
http://www.mygrafico.com/digital-stamps/big-mouth-valentines-ds/prod_6452.html


Again, to turn this one into a Valentine's card, a layered verse was added to the inside.

Thursday, January 19, 2012

Melissa's Big Birthday Giveway!

In honor of my friend's 40th, she has an amazing giveaway on her blog. You can check it out here along with the details. One request is that you promote it on her blog or tell how you will talk it up online if you don't have a blog of your own. Another is to tell about your favorite birthday gift in the comments section...what a fun way to reminisce about a favorite birthday of the past. Thanks for the flashback, Melissa!


Wanna know how I spent my 40th Birthday?
Fleeing hurricane Francis....9hrs. to get to Savannah...not exactly what I had in mind. The upside? When we continued on to Cumming, GA where my sister-in-law and brother-in-law live, we got to visit with our old friends and neighbors in Sugar Hill. So I got to spend it celebrating with special people after all, just not the way I thought it would turn out. Anyway, nothing could top my 30th surprise party. My DH took me to dinner with my parents, then had all the neighbors waiting poolside at a catered party on the deck when we returned from dinner and drove up to the pool. Even bigger surprise was walking down the stairs to the pool seeing my Confirmation picture (with white robe and little red beenie hat) blown up to poster size and signed by all in attendance. Needless to say, I ran back up the stairs in horror. Turned out to be a very fun night and I also found out that I was expecting our 2nd child. So I couldn't celebrate the way everyone was intending for me to, but had a real blast chatting and doing karaoke with our friends!

Do you have a favorite birthday memory to share? Tell me about it in the comments section.

Tomorrow I will post a photo of my favorite birthday gift! Until then...

Tuesday, January 17, 2012

The Flight Continues

I really find it interesting knowing the story behind projects. Inspiration comes from many sources: our surroundings, personal experiences, favorite colors, images or designs, and even favorite products. These are but a few of the many things that can inspire a project. This card creation was designed to thank so many people who thoughtfully and generously reached out to our family during the loss of my mother-in-law, Jackie.

Mom’s favorite color was cobalt blue, but she just loved blue in general, so that is what I made it the main color used on this thank you note. I wanted to include some symbolism of her transition from her life here to a life in heaven. I believe this montage of butterflies does just that.

Supplies: (Stampin’ Up!®) Asstd. Blue Cardstock; Sizzlits Beautiful Wings Die; Thanks So Much verse; Finial Press Texture Embossing Plate; (Offray) Blue Satin ribbon; (Glue Arts) Extreme Adhesive Squares and Glue Glider™ Pro with high tac adhesive cartridge.

Butterflies also are a visual symbol for me of the life/death/after life transition since my uncle’s death in 2000. I would often get butterfly visits on my walks and have many other tales of this connection, too. Using a monochromatic color palette (different shades of the same color) creates a very elegant look that you can use in all your card designs. The cascading size of the butterflies adds movement and interest. This also serves to remind us that even though a loved one’s presence fades, the memories remain even though their flight continues.

I wanted to share another butterfly card created by fellow card designer, Diane Bove. She created these 3-D butterflies using a brush from my Stylish Butterflies set combined with patterned background.


Here is a preview of that set art which contains, editable eps, jpeg, png and abr (brush files).
The set contains 3 butterflies: one solid, one with transparent swirls to use over color or patterned backgrounds digitally and one butterfly with white swirls. If you use the photoshop brush file you can change the black to a color or patterned background. I will be creating some tutorials to show you how you can use digital brushes and png art in Photoshop. So check back to my blog for updates!


Let your creativity take flight with using a butterfly on your next card creation.

Sunday, January 15, 2012

Color Focus for 2012

Part of Living Life Creatively means that I like to try new things for inspiration and tackle new design challenges. This year I have decided to create a single color palette from which I will create all of my colored clip art designs...or at least I will attempt not to break my own rules! ;)
My focus this year is on color combinations. Part of this means that I will share favorite color combinations for you to try out in your design projects. Some of these may be outside of my own 2012 color palette, but nonetheless, nice combinations for color inspiration for crafting, fashion and home decor.
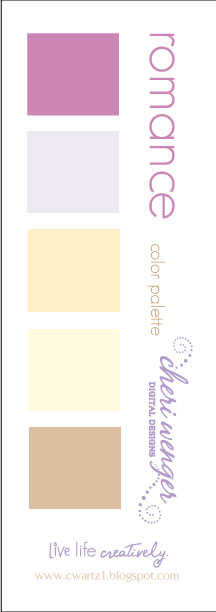
With Valentine's day around the corner, my first color group is titled the Romance color palette. Can't wait to see what you create with this color group. Email me at artz1@cfl.rr.com with your photos and I will share them here, or leave me a comment with a link to your blog post. Happy creating! 


Oh, and I have tweeked the design for my tag line. I will share a peek at that below.

I have lots of new plans in store as I am tackling working on two websites...
one for my overall design work and one for my photography.
Both are still in the baby stage of preliminary designs.
It will be so fulfilling to be able to tie together all of the ways that I