Showing posts with label ML Fruity Florals. Show all posts

Friday, July 15, 2011

Project 365 Challenge - Days 147 - 154 Seven days of Inspiration

Day 147 - Selecting, Printing & Sorting Photos
I understand that a photo of boxes of photos may not seem very creative, however, it can be a very time-consuming task going through all your digital photos and making prints for future projects and gifts. Today, I am inspiring you to make prints of your favorite pictures. Print some for yourself and others to give as gifts.

I wanted to give Ashley’s best friends, all seniors who were graduating, prints of favorite photos from their best friends photo shoot I did along with their graduation cards and other gifts. The kids all really appreciated the prints. In this day of digital where most of their images are stored in facebook albums, they liked having tangible photos that they can take with them to college and hang up in their room.

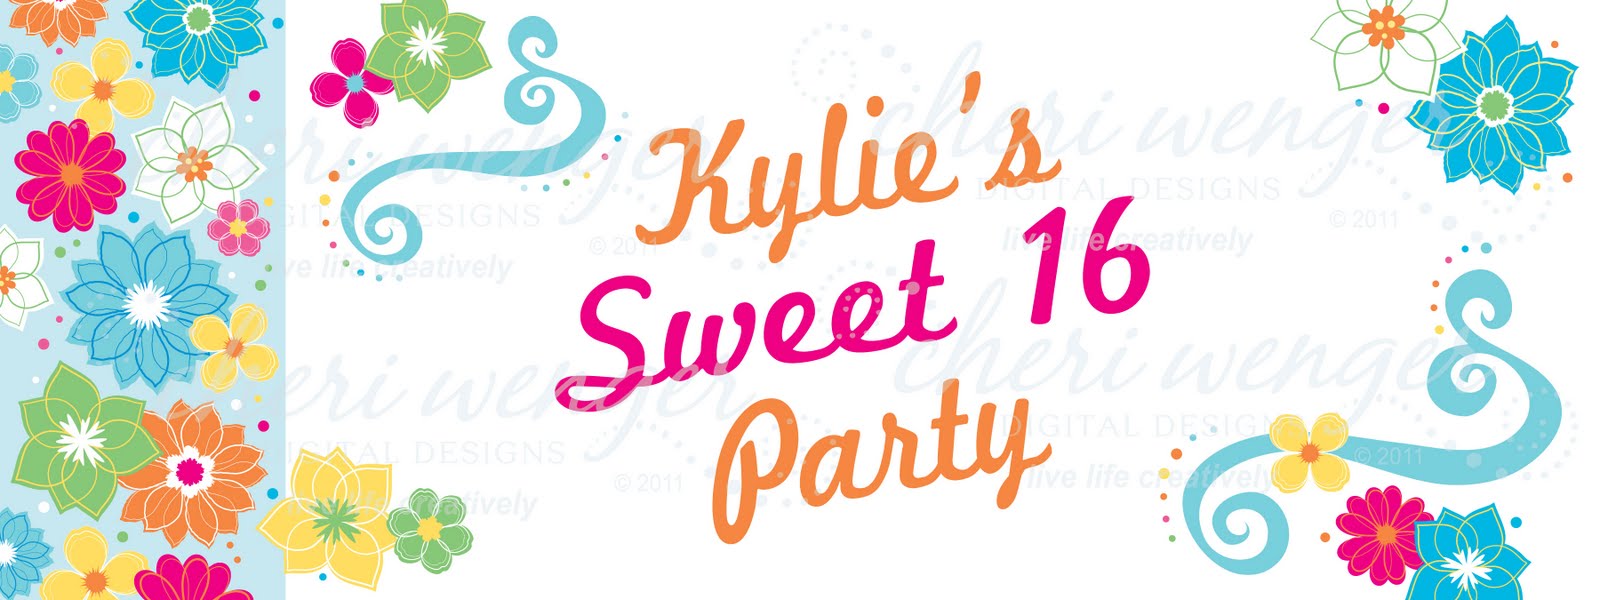
I also printed photos to make an album for Dan for Father’s Day of the girls along with sets of prints taken when family came to visit for Ashley’s graduation and Kylie’s 16 Birthday party. I was lucky enough to take advantage of 10 cent prints at Walgreens...lots of sorting, yet a creative use of time! Look for specials at Walgreens, Walmart, Shutterfly or Snapfish to save on printing your favorite digi photos.

Day 148 - Red White & Blue Graduation Card
Traditionally stamped card in red, white & blue featuring silver embossing which always add elegance to any card creation. I used silver ribbons for texture and to compliment the silver on the card.


Day 149 - Mulberry Floral Birthday Card
Digi stamps don’t always have to be printed in b&w! I colorized my Gardenia digi stamp in photoshop to match the paper, then add touches of color. I will be sharing a tutorial of how to do this soon.


The art is from my Gardenia Digi Stamp set:

Day 150 - Pastel Gardenia Birthday Card
Using the digi stamp from the same set featured yesterday, I created this hybrid card layering the b&w stamp on top of a digital paper with lace frame. The lace frame, I created using a lace strip from my Gettin’ Grungey collection. Since my mom loves lavender, I used that as my color palette and paired with the patterned paper from Basic Grey. A traditionally stamped birthday verse was added with some punched border strips and a ribbon. To achieve the soft coloring on the flower, I used chalk pastels.


Day 151- A Good Luck Grad Card Made in Minutes
What do you get when you pair a cool foil stamped piece of card stock with some DCWV cardstock, ribbon and a stamp? The answer is a card you can make in only a few minutes. Every card doesn’t have to be a masterpiece. This one proves, simple and elegant can be just as nice!


Day 152- Pulling from the Stashes to create a vintage card
This Vintage Hybrid Sympathy Card was created from elements in my digi & svg print and cut stash, a folder I keep with misc. printouts of digi art and svg cutouts for use on future cards and projects. I paired the digi stamp from my Elegant Frames set with a Swirly QZ’s dicut, some ribbon, old patterned paper, flowers, pearls and a paper butterfly diecut element to create this sympathy card for a family member.


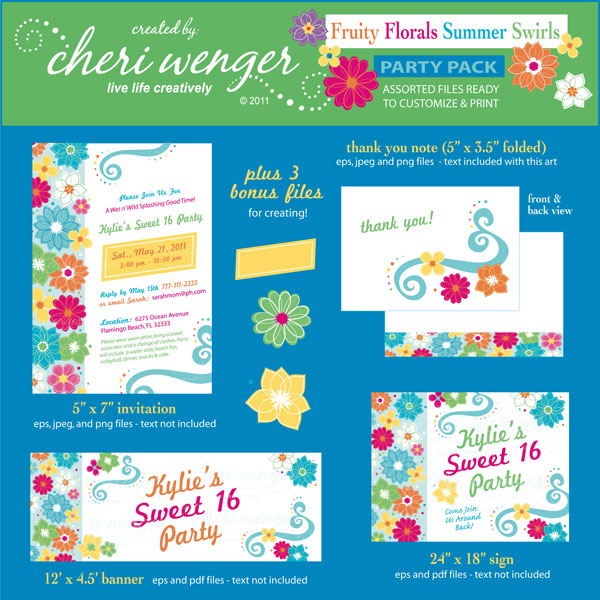
Day 153 - New Party Pack Set & samples
I designed this Fruity Floral Summer Swirls Party Pack collection, which was inspired by my ML Fruity Florals collection plus the need to design an invitation for my daughter’s 16th birthday. It evolved from that into a banner, sign (featured on days 127 - 129) and now, a thank you,  so why not put it in a collection to make someone else’s life a whole lot easier?!!!!


Day 154 - 25th Anniversary Card
Next month is mine and Dan’s 25th anniversary and knowing how time flies, I made the card back in June using more of my Swirly QZs svg diecuts and some other items from my favorite stash piles. I love this paper from the Girls Paperie...so pretty and it paired well with my polka dot silk flowers and swirl flourish. I used a brown digi printout of art from my Special Numbers collection to matt and layer on top. The oval was a saved diecut that added a matted effect when layered over the patterned paper. When embossing card stock with folders and end up with mini scraps, try layering under a stamped verse as I did in this card sample. Another tip to try is tying sheer ribbon around your background layer before mounting, then layering elements on top for a multi-dimensional card creation.


Here is a preview of the Special Numbers Collection, one of my earliest releases, an oldie but goodie!


Hope you found lots of cardmaking inspiration from this week’s flashback to my Project 365 challenge.

Wednesday, June 29, 2011

Project 365 - Days 125 to 135 Creativity meets life

When you live your life creatively, it is hard to keep the artistic side out of normal life. Don’t get me wrong, I am no Martha Stewart handmaking cookies and creating decorated lunch bags (well, LOL maybe I am guilty of creating a few of those ;] ) however it is difficult not to bring that side of me into everything I do. This leads me to the first, kinda boring yet possibly inspiring project of the day...finishing painting our combined family room/kitchen. Let me back up a little.


Dilema: Our ceilings our 10 ft. high, all corners of the room are soft rounded edges that blend basically from room to room. So when I redid our living room area in a bright golden yellow to give it a tropical feel, I had to decide how to transition into the kitchen/family room area without the bright color overwhelming the room. I chose a toned down version of the yellow and followed all the rules before painting of observing the color chip at different times of the day.

Bigger Dilema: The one thing I didn’t factor in was my faux tropical green wall. I loved the solid paint color most of the day but hated how the green reflected on the yellow in one corner of the room at night time. So we have had a half painted space for more than a year. Today I decided to get over that one corner and paint the rest of the room to match!

I swear that I have creative dyslexia! I had to use some Kilz to touch up a few dark marks on the wall fist, as you will see in the photo below, however this lead to me spending most of the day moving from one room to the next touching up all the trim and smudge marks throughout the house. The downside of this creative inspiration is that I didn’t actually get to start painting this wall until about 9 pm and finished clean up around 1 am. Not to mention how many squats I did! For a girl who spends a lot of time sitting at the computer, I know that I will be feeling it tomorrow!

Warning: Painting is a full body workout. Proceed with caution!!!

Day 125 - Finishing the Painting of the Family Room & Kitchen Walls


The touch up...


Here is a photo taken of the area on Kylie’s Birthday. My dear husband had to finish painting over top of the cabinets since I am vertically challenged even standing on the countertops. He is 6'3"!


Day 126 - Sketches for my Beaverettes set/ Happy 16th Birthday, Kylie!
Sometimes in the design process there are customer requests for sets. This was one of those fun challenges...girly beavers going camping & swimming. These were some of the preliminary sketches.


And here is a picture of my birthday girl on the morning of her sweet 16th birthday...


Day 127 - Kai’s Sweet 16 Birthday Invitations plus a photo flashback of the new driver
Today we got up early to go to the DMV so Kylie could get her driver’s license on her 16th birthday...think she was a little anxious about becoming a new driver?!!! She passed! Couldn’t resist sharing this scanned photo flashback of her when she was little sitting in her Cozy Coupe.


The rest of the day included designing her birthday invitation. I went to my own digi design collections to jumpstart the creativity...


Here is the invite with personal info changed up...

Day 128 - A Yard Sign for the Party


Had this printed onto coroplast to put outside our friend’s house by the beach. She has a huge backyard for us to do the huge slide. We did this 2 years ago for her sister’s 16th birthday and it was so much fun.

Day 129 - Now we need a banner!


So I am starting to like the look of these designs and I think I am on track to design a party pack set with maybe thank you notes added to the set...hmmm. You see how one moment of creativity snowballs into another. And so is goes when you live life creatively :D

Here is an actual photo of it from her giant slide, wet and wonderful, sweet 16 party!


Day 130 - Vivid Mod Linear Florals for future designs
These are the same flowers as the Fruity Florals collection with some colors changed up!
Let me know what you think of these colors and what you think I should create with them!


On the last day of my last project 365 update, you got a peek at some of the set elements. 
Here is the finished digital collection.


Day 132 - Shabby Chic Thanks


I haven’t had time to create many cards lately, but I got inspired by these paper and embossing scraps to make up this paper crafted card...no stamping involved on this one. I used Glue Arts’ U-cut-It adhesive foam to pop up the Thanks so much paper element for dimension. The gorgeous patterned papers are from The Girls Paperie. The verse and mini flower are from Studio 112 from JoAnn’s.

You saw the earlier sketches. Now you get to see how that evolved into a digi collection! Think of the fun you could have cardmaking or scrapbooking with this. You can layer and overlap the png files since the backgrounds are transparent, but the designs come with a white under layer, as shown below.


Day 134 - Best Friends Photo Shoot (The Seniors)
Our daughter, Ashley has the nicest group of close friends...the fab 5. All the parents have enjoyed watching them go to homecoming dances and prom together as well as enjoying many fun boating and beach days spent during summer break. Three are headed to the University of Florida while Ashley and Courtney will be roommates at Florida Atlantic University. We can’t wait until Labor Day weekend when the two schools face off in football. We are thinking we will make it a road trip to Gainesville so all the parents can reunite and the kids can have some fun taunting one another. We love the Gators, too, so it should be a fun time if we can score tickets to the game. 

These are some low res versions of a few of the favorite photos taken on a super windy day at the beach of Ashley with her soon-to-graduate best friends. (I am late posting these so they are all grads now!)


Wednesday, June 22, 2011

Project 365 - Days 116-124 A Springboard for Creativity

Yes, I know, I know, it is about time that I start catching you up on my project-a-day creations. Considering that I am up to day 174, I have a lot of updating to do. Some days it is photography, others it is sketching or art for new digi designs and on the really fun days it involves making projects!!!
Here is the first round. Hold onto your seats cause there is a lot of creating going on!!!

Day 116 - Flower Petal art for new set


Day 117 - Floral Silhouettes for future set

Day 118 - Mod Linear Florals (brush & art for creating sets)


Day 119 - ML Fruity Florals Set


Day 120 - Mod Linear Fruity Florals Invitation Sample


Day 121 - Gardenia Line Art for set


Day 122 - Pic a Year Photos for Kylie's Birthday


I put together photos of Kylie from 3 mos. to sweet 16 as a countdown to her birthday. I posted these on her facebook page from when she was little to present. Here is a slideshow of the images:


Day 123 - Gardenia Digi Stamp Set & Samples


Day 124 - Princess Grad Elements for future set
There is more creativity to come....so check back often!


Saturday, May 21, 2011

Time for a Spring Sale at my Digi Shop!

If you like the look of this banner advertising 30% off in my shop, then you will definitely like the new ML Fruity Florals set or the ........set. It is spring and everyone loves creating with pretty flowers. Another great set on sale is the Gardenia Digi Stamp. The sale lasts two days only - May 22 & 23rd until midnight. Hurry to save on the latest digital designs by Cheri Wenger (that’s me!)