Showing posts with label 3-D. Show all posts

Saturday, January 22, 2011

Project 365/Day 21 - Cardmaking with Ree

Sometimes you are lucky enough to find a friend in life who makes you feel totally appreciated, who shares a passion for the same things you do and inspires you to be a better person. This is what I have found in my friend, Ree. She is a wonderfully sweet person (who is soon to be seen on Extreme Home Makeover in February) since she volunteered to help out with a home being built in the Central Florida area. She has more energy and enthusiasm about life and stamping, and has helped build my self esteem in always crediting me as her creative mentor. Whenever we get together for a day of stamping, I always leave with a smile. We share new tips and techniques we picked up between our play dates and catch up on family and friends...isn’t that the very best of living life creatively?!!! Here is a mishmash of some of what I created. We did more talking & eating than creating, but walked away energized and inspired to try new products and techniques.

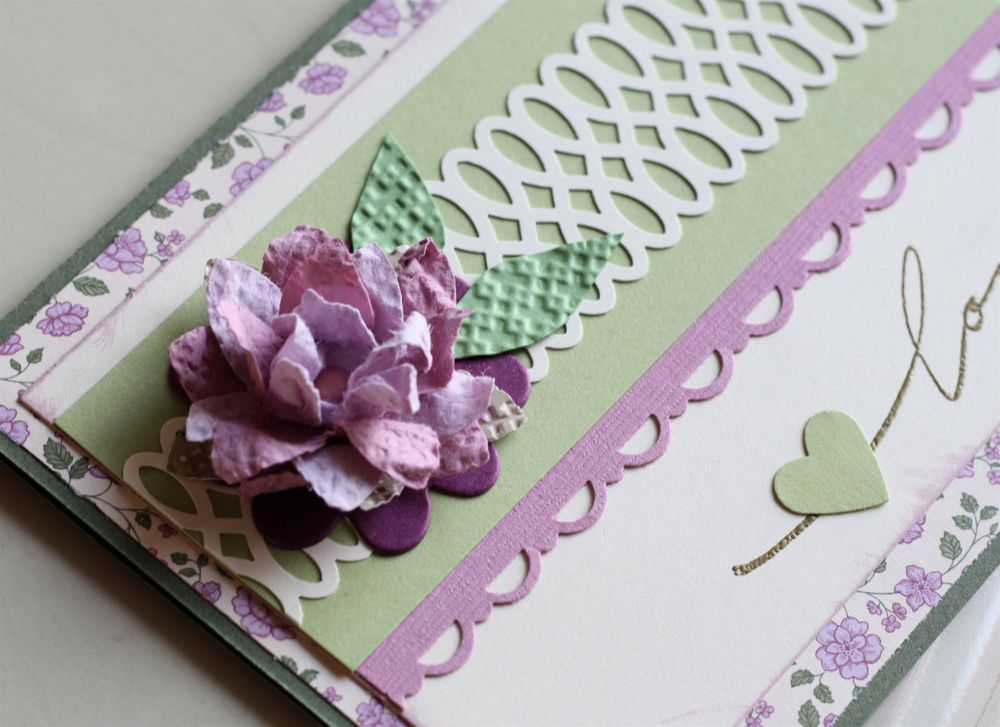
I was very anxious to try out the Springtime Vintage DSP collection and pear pizzazz seam binding ribbon that was part of the goodies she gave me for Christmas. I typically am not drawn to old fashion style papers, but wow, was I inspired the more I worked with this. And the softness of the seam binding ribbon is awesome. I insisted that she teach me how she made these incredible paper flowers on a recent project she posted. And in her truly generous spirit, she dropped what she was doing to teach me how she made them. I am a bit disappointed that after mine flattened out on the ride home, I haven't been able to restore it to quite how good it looked when I was at her house, but you get the idea. And...it was made using the 5 petal flower punch, an idea she cased on the web. Pretty easy to do, and they looks so beautiful. Not great for mailing, but excellent for hand delivered cards and gifts! Check it out...


I took some closer up photos too. It is assembled using a simple brad!
I hand cut some accent leaves from Wild Wasabi that was texturized with an embossing folder.


And here is Ree’s Beautiful Letterpress card that was my inspiration!


Here is the Vintage Love Ya Card I made at her house
using background paper from Springtime Vintage DSP from Stampin’ Up!®
and 3D stamped butterfly cut out from K&Co Que Sera Sera clear stamps.
This card features the pear pizzazz seam binding ribbon...can you say gorgeous!!!
Trust me you will love the feel of it and using it on your projects.


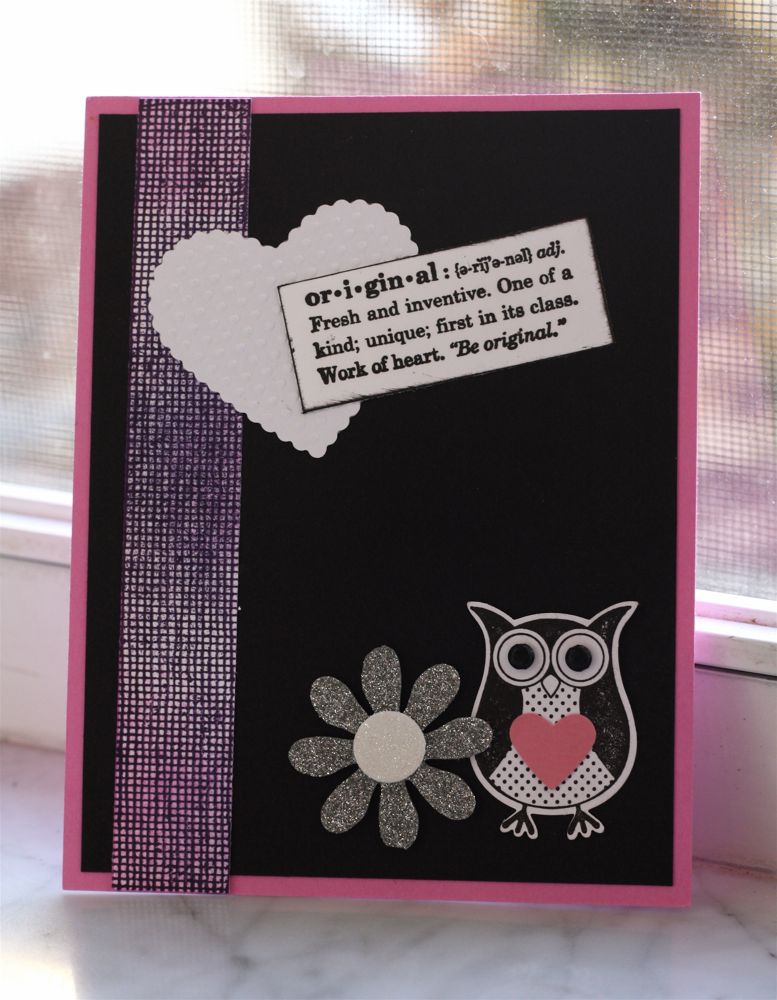
My daughter had to make a poster for a conference she was attending this weekend and we picked up some silver glittered adhesive foam for her to create the letters and graphics. She had some leftover scraps so I brought them along with me for Ree and I to play with. She ran some through the diecuts she had and I had fun using them on a couple cards. She really liked the color combination of red, black and white and silver. This could be used as a simple valentine, but I made it into a Thank You card.


I swear that this pink and black background with the canvas textured stamping strip has been in my scrap pile for several years now. I finally snagged some other scrap elements to make it into a cheery card. Don’t you just love that lil' owl. He is in one of the stamp sets (Punch Bunch) that are available for free during Sale-a-bration with a $50 purchase. So if you are needing any SU supplies, now is the time to order. I no longer am a demo, but Ree can take care of that. She has a website for doing online orders.


So, I encourage you today to surround yourself with friends who inspire you creatively and it will enhance your experience  and inspire you to live life creativley!

Thursday, November 18, 2010

A Reminder that No One is Perfect ;)

The other night I was working on a design team project that in my head I had thought out and planned so well, but in reality, I got so absorbed in the creative process and over looked one small detail...that when I took the glass and easel backing out of the frame, I never checked to see that rotating the frame to the left side would make the mounting upside down and the easel stand visible when placed back in...one small detail that I didn't find out until I was finished and ready to photograph my latest masterpiece. So, you know, it was one of those God moments reminding me that no one is perfect so don’t feel too overly proud of your creation. I learned to love and appreciate it, flaws and all and humbly share my mistake with you!

Family Thoughts Collage Photo Frame


This design team project was created using a frame made by Darice which is ready to decorate. 
My favorite feature of this project is the mini shadow box frame on the top right and the little message in the frame on the bottom that reads “you’re never more than a thought away”. I plan to put prints of our two daughters in the frame. I loved how the colors in this Crate Paper Restoration Collection go with our color scheme. And I love the shabby chic, vintage style too! And another new favorite purchase is the infinite loop trim punch from Martha Stewart. I will be creating lots with it for the holidays!!!

For more on this project, check out the post on Glue Arts blog for a supply list and instructions. It also includes the mini tutorial on how to create the mini shadow box frame. Here is a close up view of the shadow box frame and the flowers that I cut out of the slipcover cardstock, wet and manipulated to give them more dimension. I used Glue Arts’ extreme adhesives and U-cut it foam on this project.


My mantra for the day...learn to love your mistakes and embrace your human-ness!